Displaying items by tag: windows
GIMP: A Free Alternative to Photoshop
Yeah, so it turns out that my Adobe Photoshop membership expired today.
I actually let it expire, rather than renew it for another month. I confess, in the past, I had used versions of Photoshop that did not come from the usual channels. After a bit of repentance, I decided to purchase the software when it came to my attention that only monthly subscriptions are available.
Now that might sound like a good idea, but for the work that I do, I don't need to keep paying $30 every month for a product that's only worth about maybe $60 total. Perhaps a decade or more ago, Photoshop was the "go-to" application for desktop publishing and graphic editing, but now there are so many alternatives that you can get at a fraction of the price you'd pay for Adobe's product.
Today, I decided to go with a FREE alternative that's been around for a while.
The GNU Image Manipulation Program (or GIMP for short) is a cross-platform image editor available for GNU/Linux, OS X, Windows, and more operating systems. It is free software, you can change its source code and distribute your changes.
Whether you are a graphic designer, photographer, illustrator, or scientist, GIMP provides you with sophisticated tools to get your job done. You can further enhance your productivity with GIMP thanks to many customization options and 3rd party plugins.
Installation is quite simple and straightforward on a Mac.
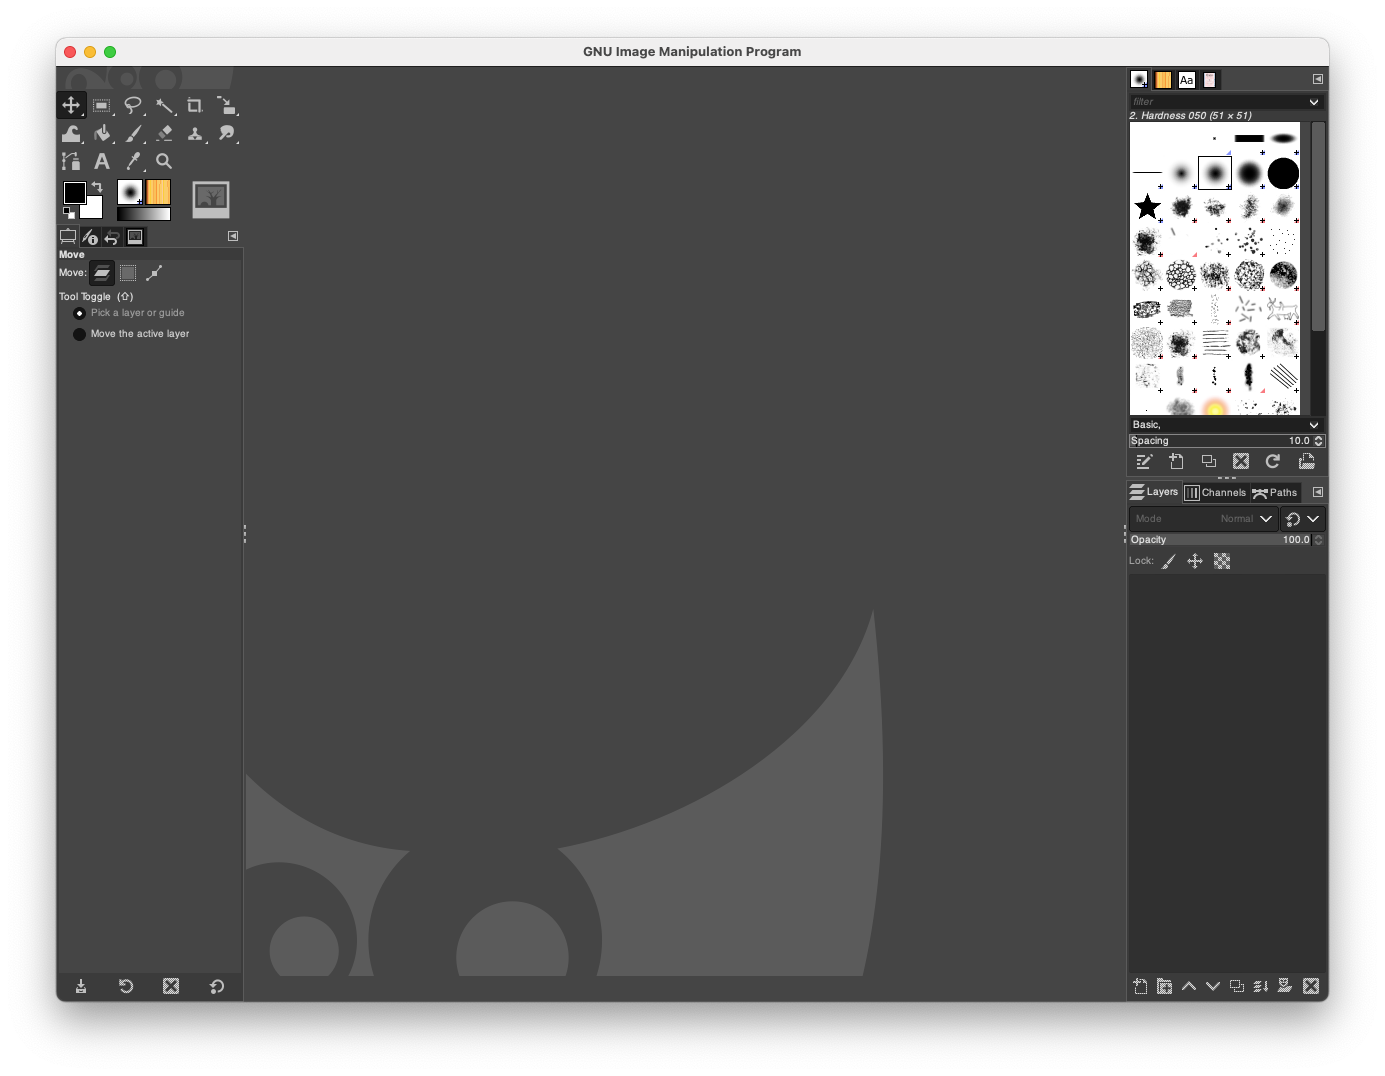
The interface is similar to what Photoshop has. For the work I do, I mainly need to be able to use Layers, be able to trace and contour and have access to lots of fonts.
Fortunately, there's a simple method to import all the fonts available from Google and have them at my ready for the next art project!
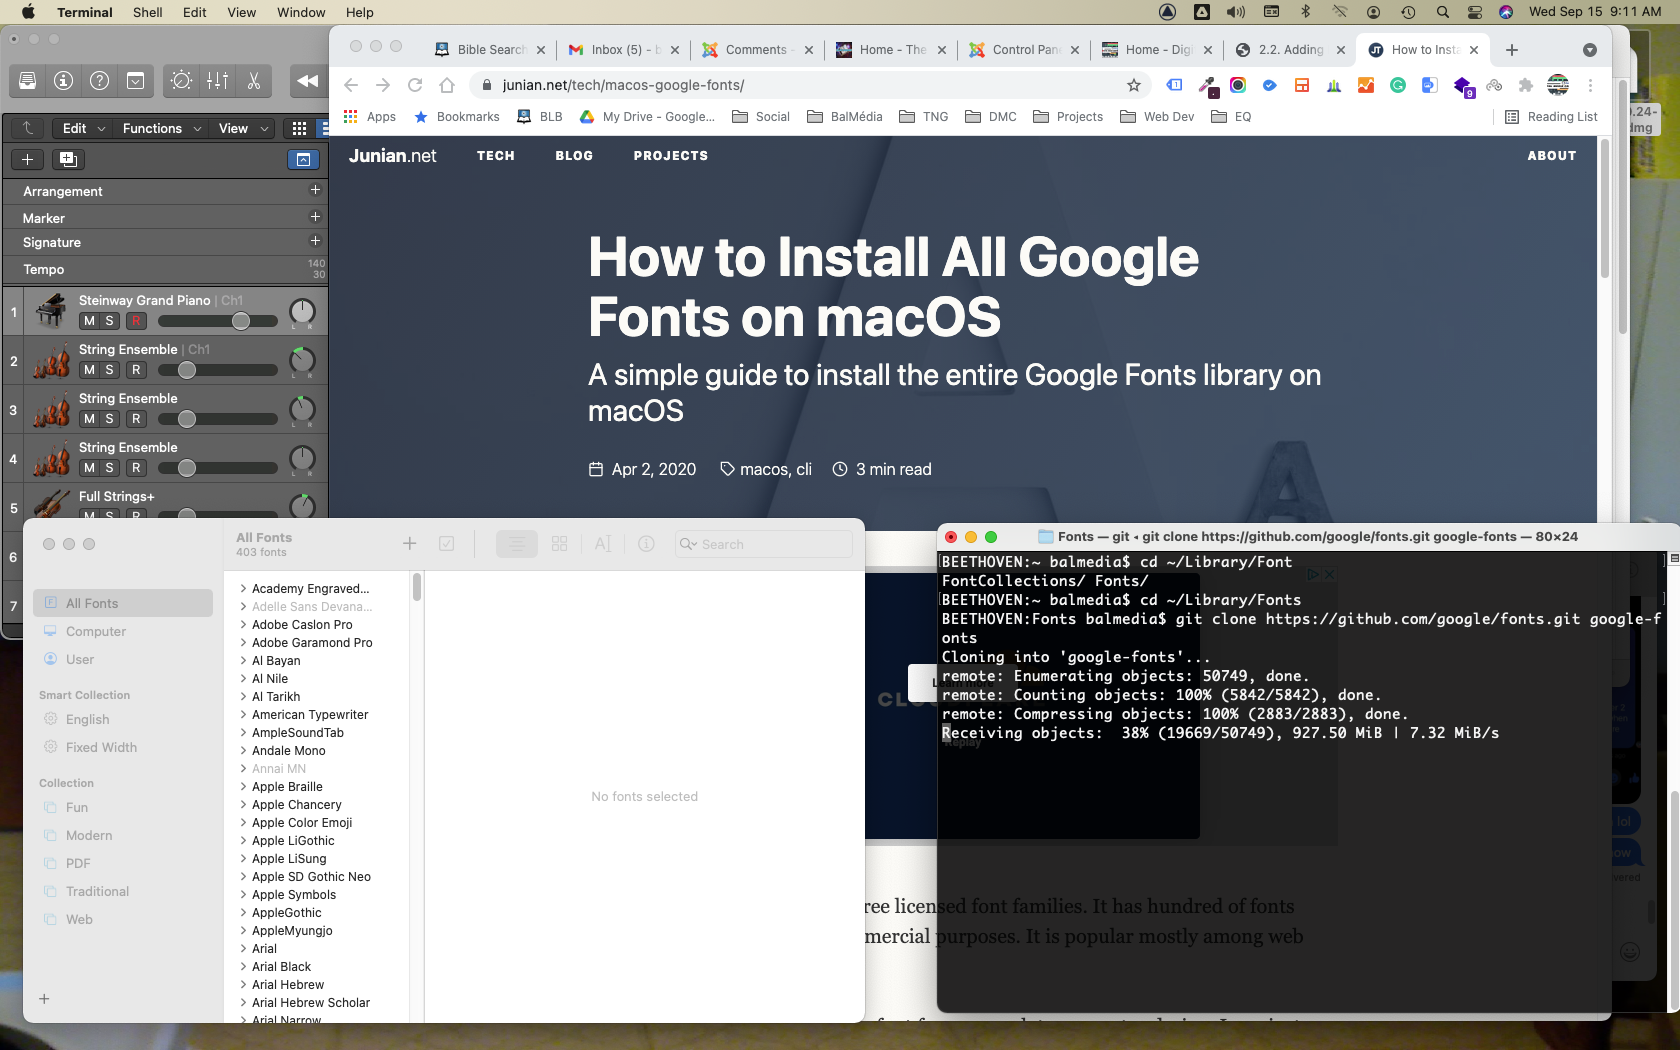
I was able to find a short shell script that does all the work for me.

It only needed a few lines of script to get to the hard drive directory where the font files would be mirrored in real-time with Google's server. It took about 5 minutes for the job to complete.
And then came the test to see if my Photoshop PSD project file will open sans faute in GIMP... I think I just saved myself $30 per month.
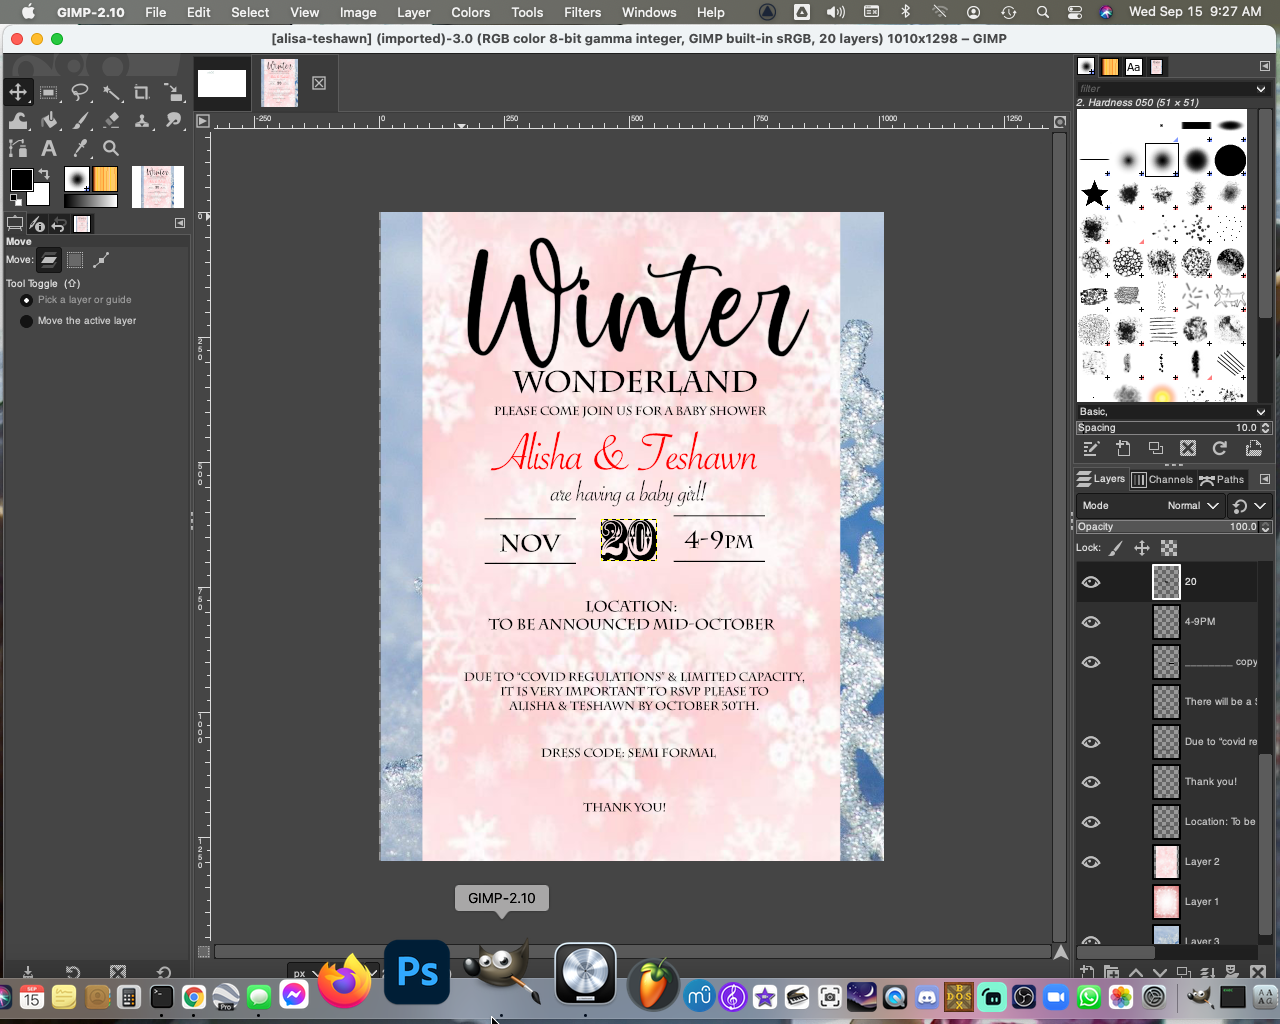
I'm quite happy with the final result, and it looks like I can finally delete that Ps icon in my Dock. Cheers everyone, have a nice day!
SOURCE
3 Easy Apps You Can Use For Writing Your Music
Now that you've taken the time to clear your mind from the daily drama n grind, you can finally get to committing that song you've had in your head onto paper.
Maybe you have a few ideas jotted down here and there, but you need to have all that in one place. Today I will discuss 3 apps you can use that are free and quite good at helping you with your songwriting process.
1. Piano Chords And Scales
To make any song sound right, you need to know your basic chords and scales. Piano Chords And Scales is available from the App Store and Google Play.
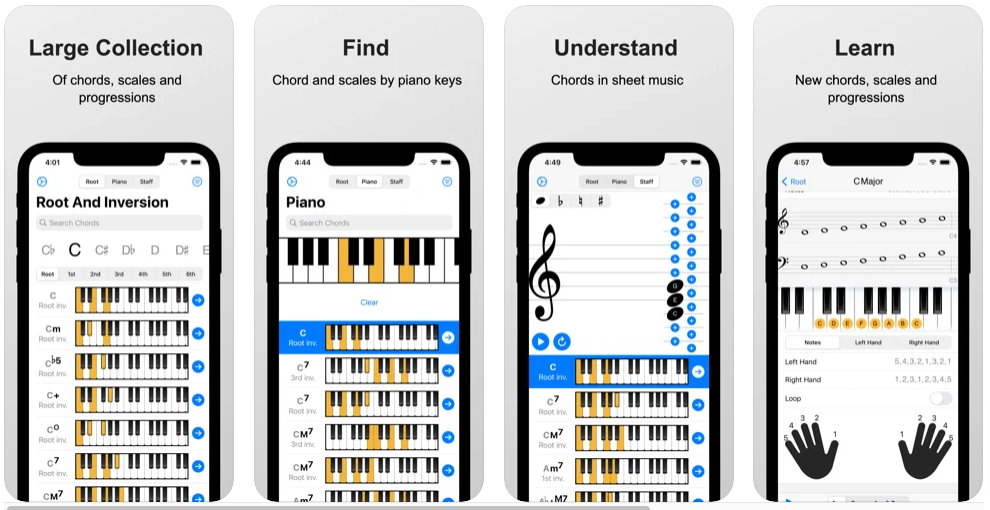
This nifty app shows you the position of all the chords and scales on the keyboard. This is a delight for those of you who have trouble reading the notes on paper but know what the chord names sound like. There's even a feature that lets you build chord progressions and write songs that you can save and playback later.
Now that you've figured out the chords and progressions for your song, you need to commit it to staff paper!
2. Musescore

Musescore is free software that is ideal for first-time score writers. It allows you to connect your MIDI keyboard, or use keyboard and mouse strokes to enter notes on the screen. It might take you a few minutes to get the hang of composing with this software. If you're feeling lost, there are excellent videos on YouTube by musicians that should help you along the way.
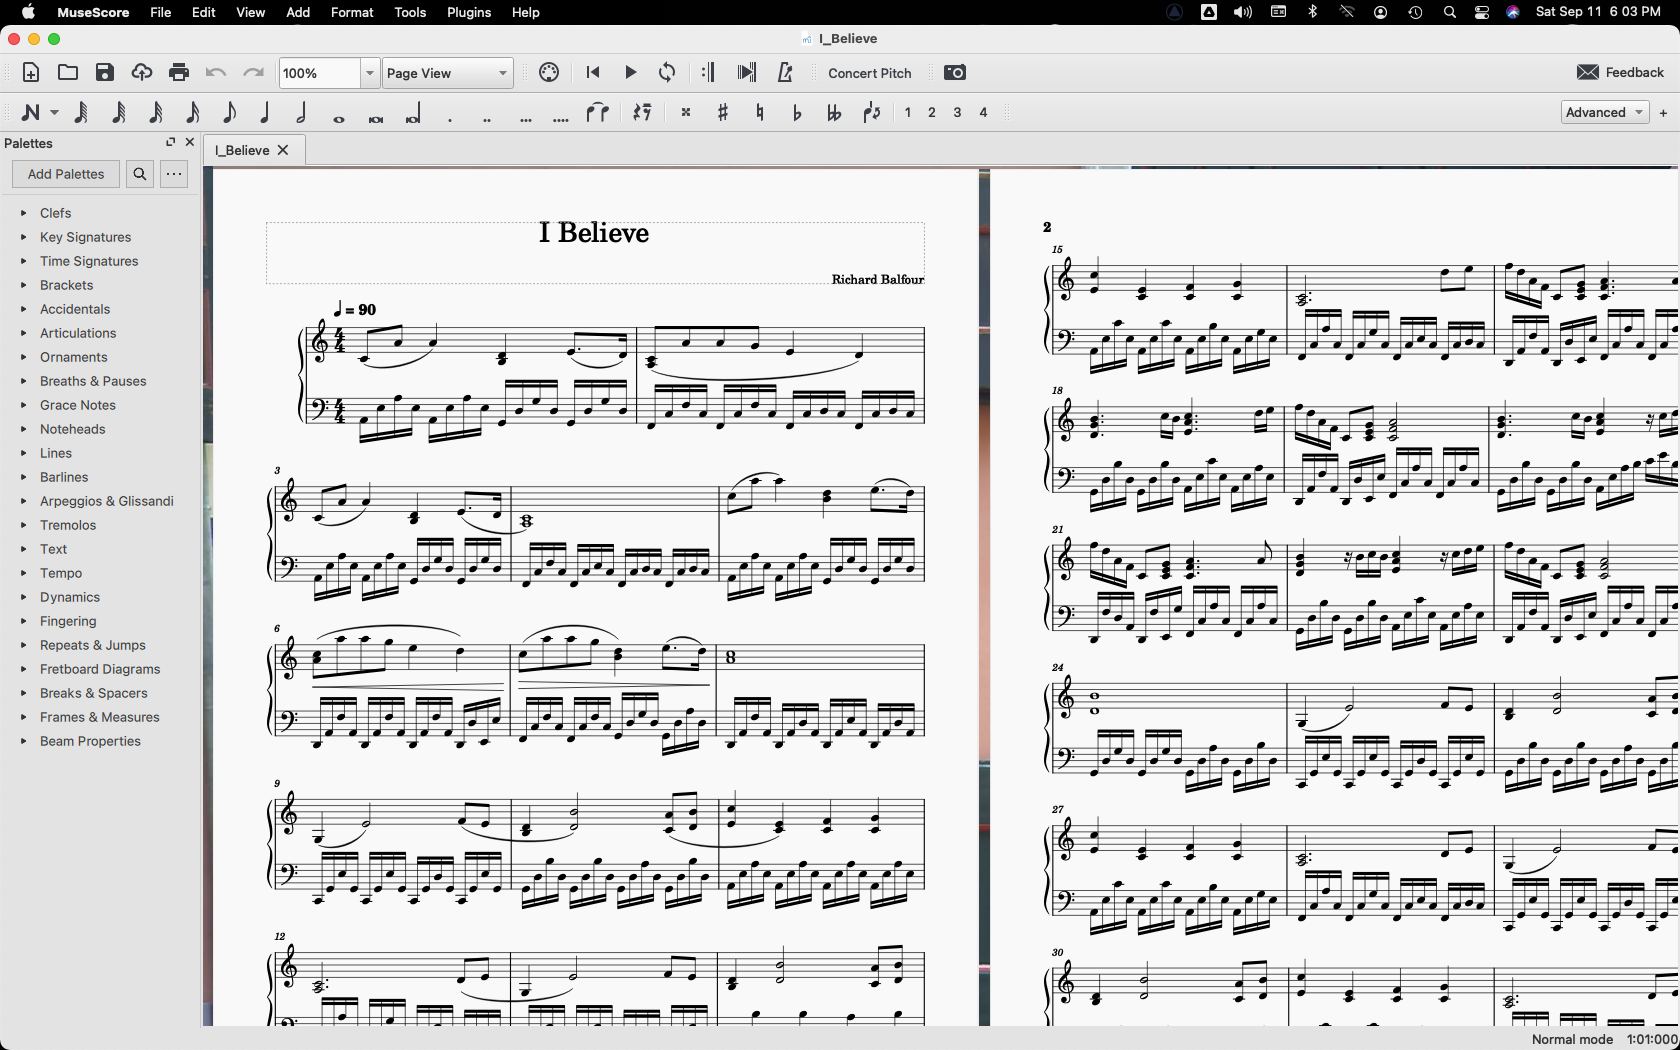
Musescore also has a community website where you will find a wide variety of songs that you can download and play for free. There is even a feature that converts your musical piece into a video on YouTube.
3. Avid-Sibelius First
Sibelius is one of the most well-known commercial music notation programs available. Their First version, a free download gives you an interface similar to Musescore, with a slightly less complicated learning curve.
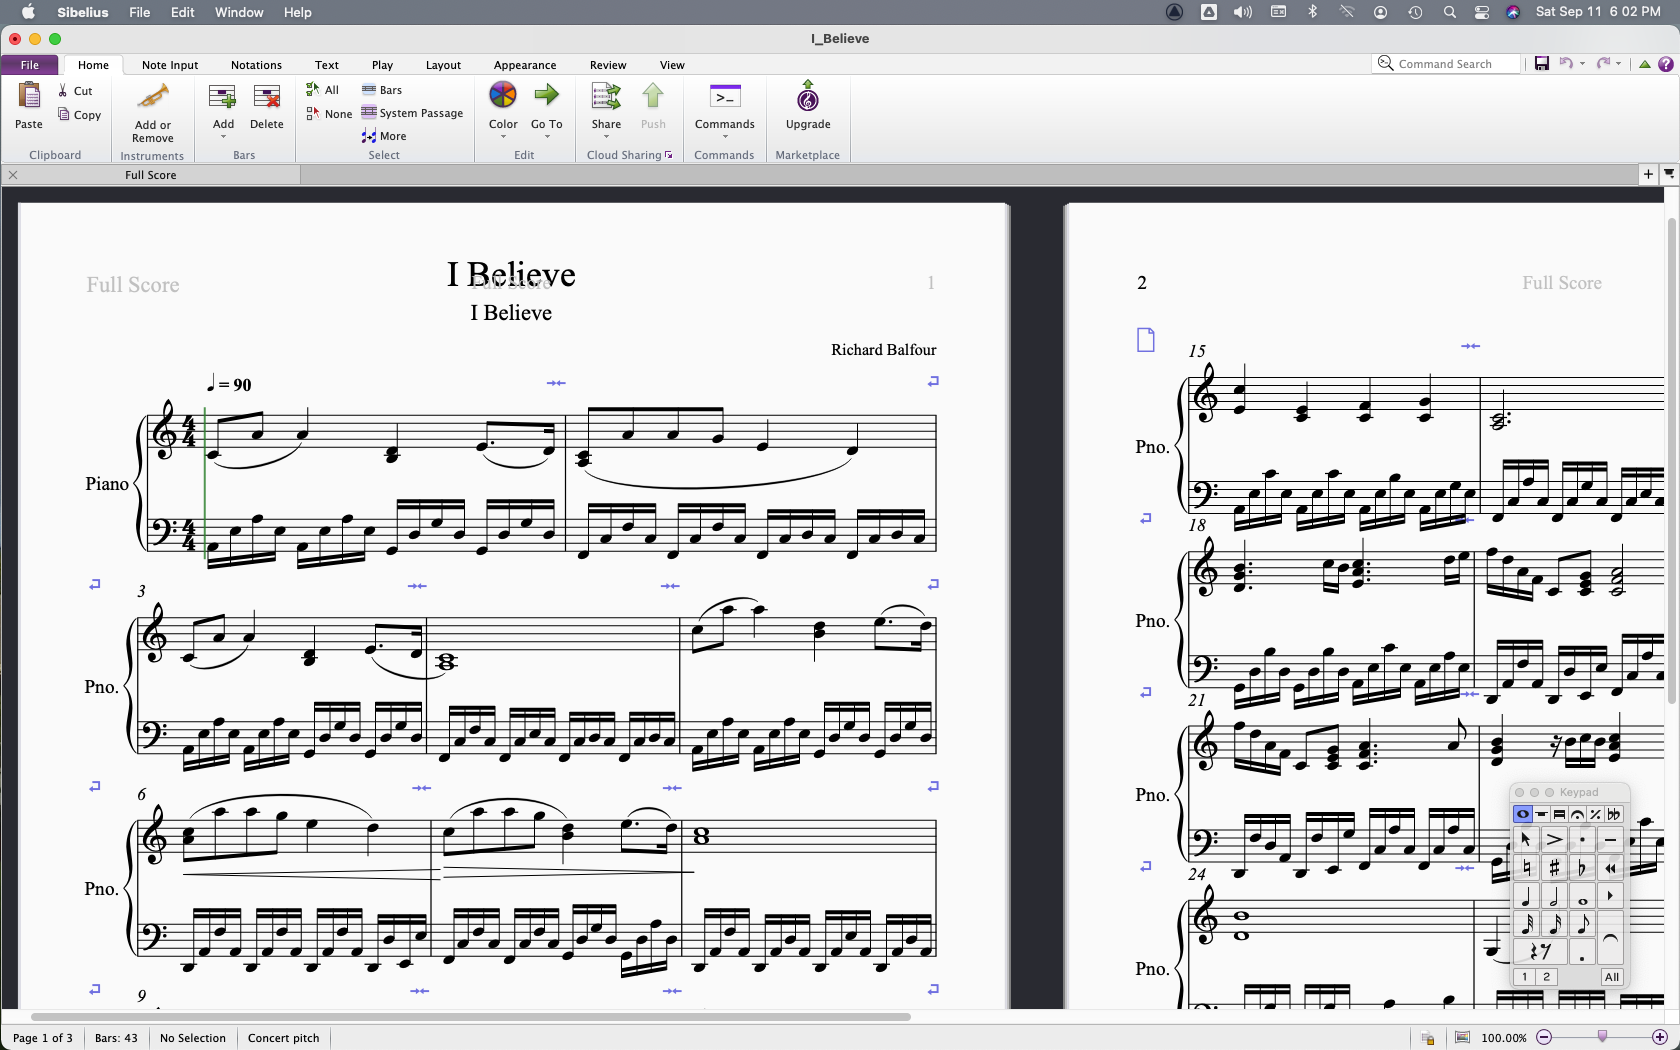
I was able to export my MIDI file from Musescore and import it without issue into the Avid software. There are a few more professional tools in this and in other versions they offer but for a free notation tool this one you can't miss!
Conclusion
Each of these tools should be in your repertoire. With some time and practice, you'll find yourself at ease creating new music and hopefully inspire others to do the same.
Choosing The Right DAW For Your Music Projects
By now I'm sure you've heard all the fuss about creating music projects on a computer.
Well, today creating digital audio projects on your handheld device or computer has become affordable and easy to do!
If you're going to take this seriously, I highly recommend investing in some proper gear first. I'll write a separate article on some good recommendations for this, but for now, let's start with a few programs you can use right away without breaking the bank!
A DAW or Digital Audio Workstation is an application that acts as a multitrack recording device. This is the equivalent of having a band, orchestra, and recording studio all in one box.
GarageBand for Mac
I'll start with the goodies for Mac users like myself. The main reason why I prefer the Mac system over Windows/PC is due to the media tools that come standard with Mac, and its framework which is built on UNIX. This offers far superior abilities than the default Windows counterpart.
GarageBand is the default DAW for Mac and it has many instruments and sound effects that can be used right out of the box. You also have the option to download extra sounds clips and instruments to enhance your workstation.

The screenshot you see here is a simple GarageBand project with 5 tracks. The tracks can contain MIDI data (in green) or sampled sounds (in blue). There are plenty of different styles of music, special effects, and instruments you can choose from. It's a simple as dragging and dropping items into place and with a bit of practice, you'll have a decent sounding tune in no time!
Logic Pro for Mac
Did you know you can get a 90-day free trial of Logic Pro for your Mac? Simply go to the Logic Pro 90-day Trial page on Apple's website and download the link on the page, install and you're good to go!
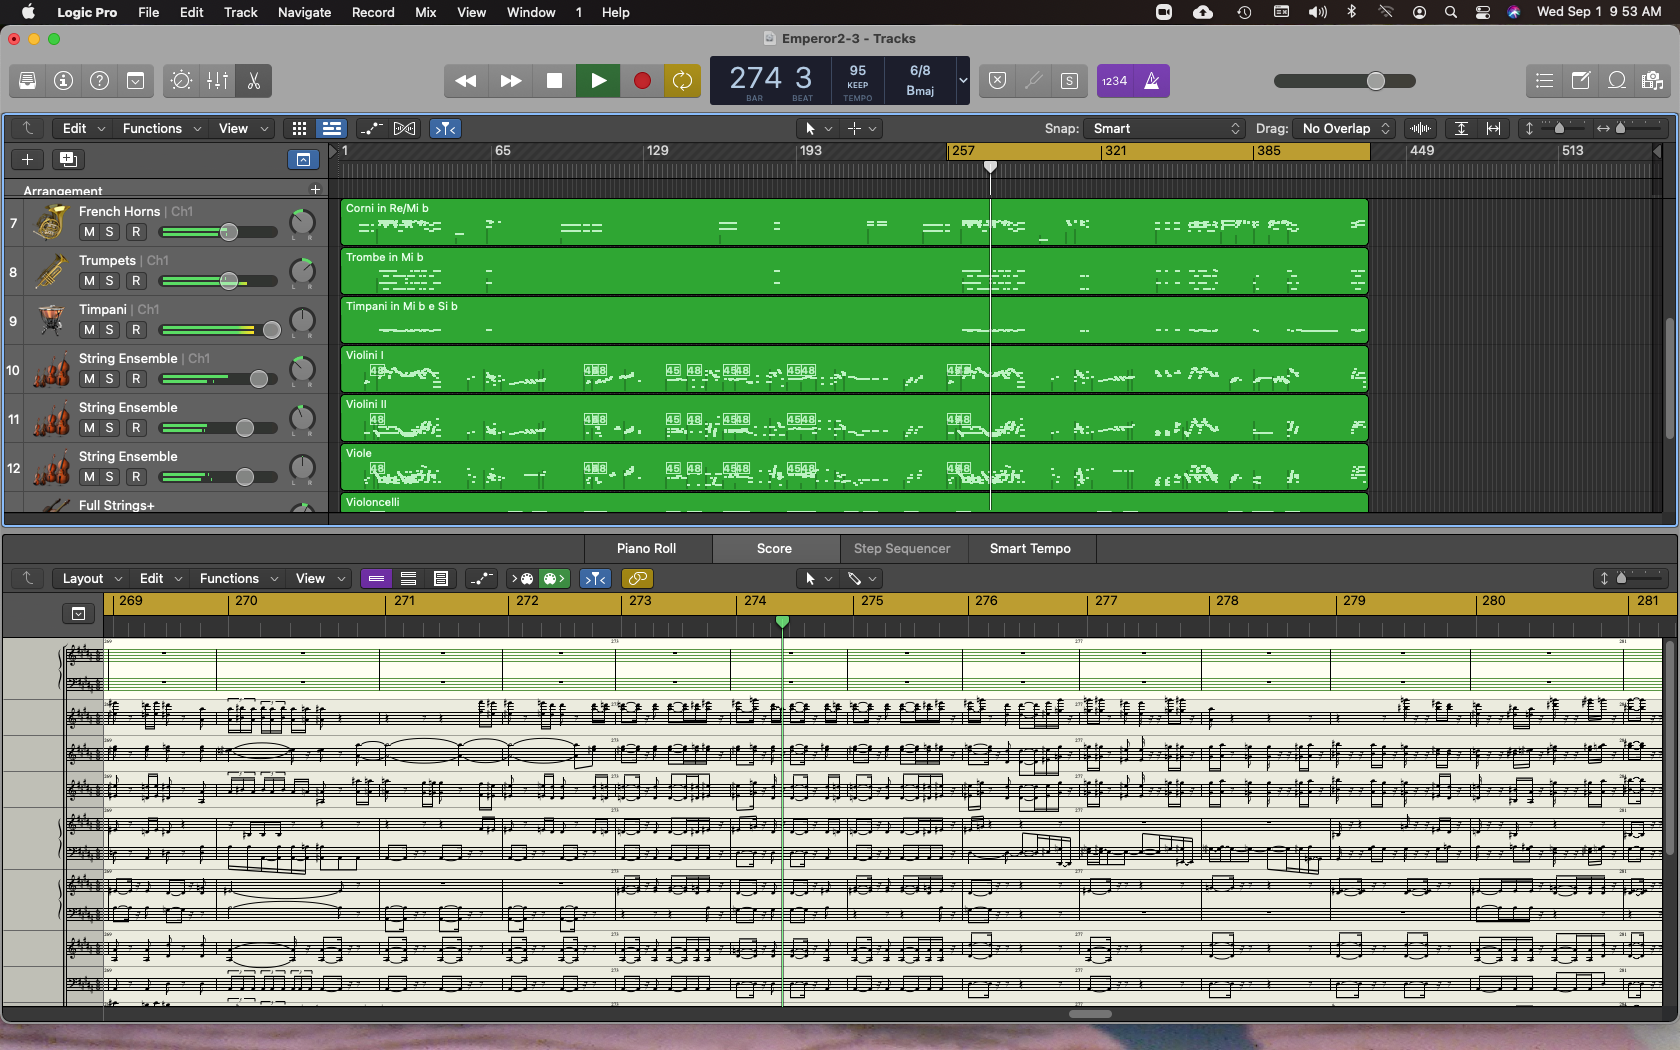
As you can see, the interface is similar to that of GarageBand, but that's about where the similarities end. Logic Pro has a much-improved soundbank library and comes with many utilities that can be used for professional audio production.
I must say that I was quite impressed with the difference in the quality of the orchestral sounds with Logic Pro vs. GarageBand. The above image shows a screen capture of the notation format available, which shows all the sheet music for the instruments being played. In this case, it's a MIDI file of Beethoven's 5th Piano Concerto (in Eb). This in itself deserves a separate blog, but for now, you can rest assured that if you want to expand your piano playing experience with a full orchestra, this is certainly a very affordable and feasible way to do it!
FL Studio for Mac/PC
Finally, the last DAW I will showcase today is FL Studio (formerly Fruity Loops). If you like hip-hop and mixing beats, this is THE DAW for you!
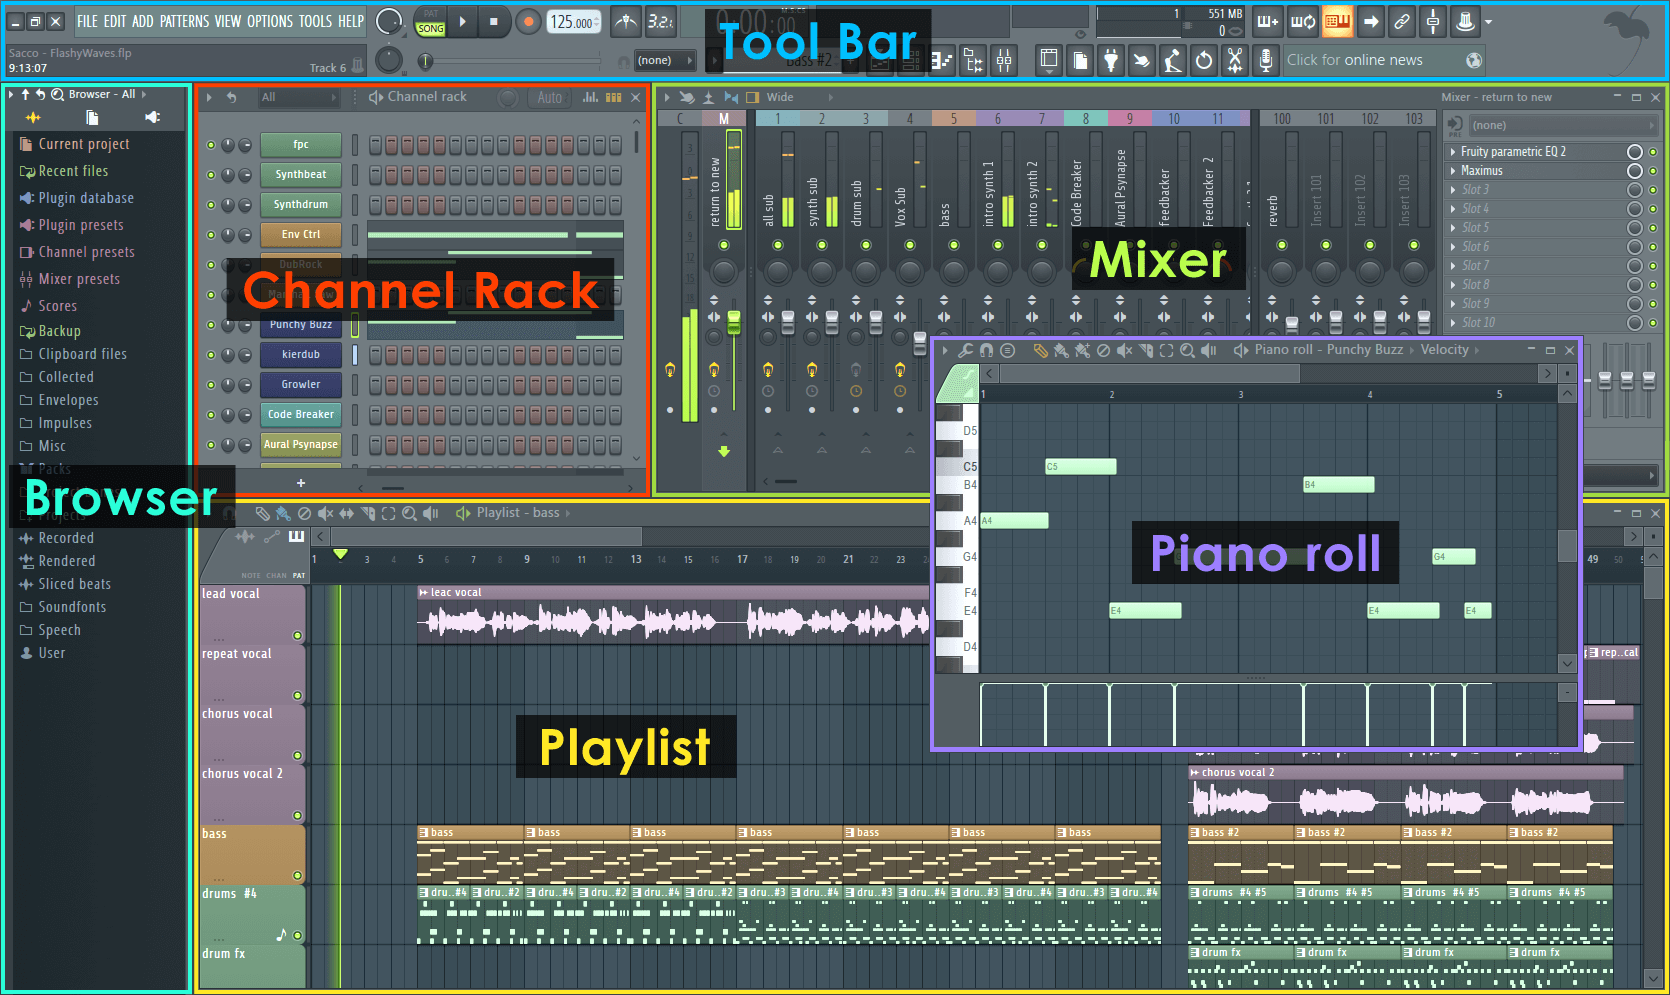
There are literally thousands of virtual instruments sound samples that can be used with it. The interface is easy to navigate once you spend a few minutes with it. The default instrument set and plugins will keep you busy and creative for sure. There's also a version you can use on your mobile device, FL Studio Moblie. Try it out!


There are also some great YouTube channels that have FL Studio experts providing helpful composition and audio mastering advice. One person I recommend is In The Mix with Michael Wynne on YouTube.
Now of course there are many other DAWs to choose from. You can do some digging on your own and come up with names like Cubase and Abelton Live, but since I have not used either and they're kind of pricey, I'll just stick to what I know and trust!
In the coming days, I will share with you some practical examples of using a DAW as a band practice buddy. Who knows, just in case there's another lockdown it will be reassuring to know I'll have something to keep me entertained and sane with... lol.
References:

